Live Captions for Talks and Conferences: A Setup Guide
By|Avoce·July 17, 2026

The biggest risk with live captions is an avoidable on-site failure: distorted audio, a missing display, or a mistranslated name. A 15-minute rehearsal prevents most of these problems.
Prepare three things before the doors open
Secure clean close-mic audio, decide whether captions appear on a screen or through a QR, and add speaker names and specialist terms to the glossary.
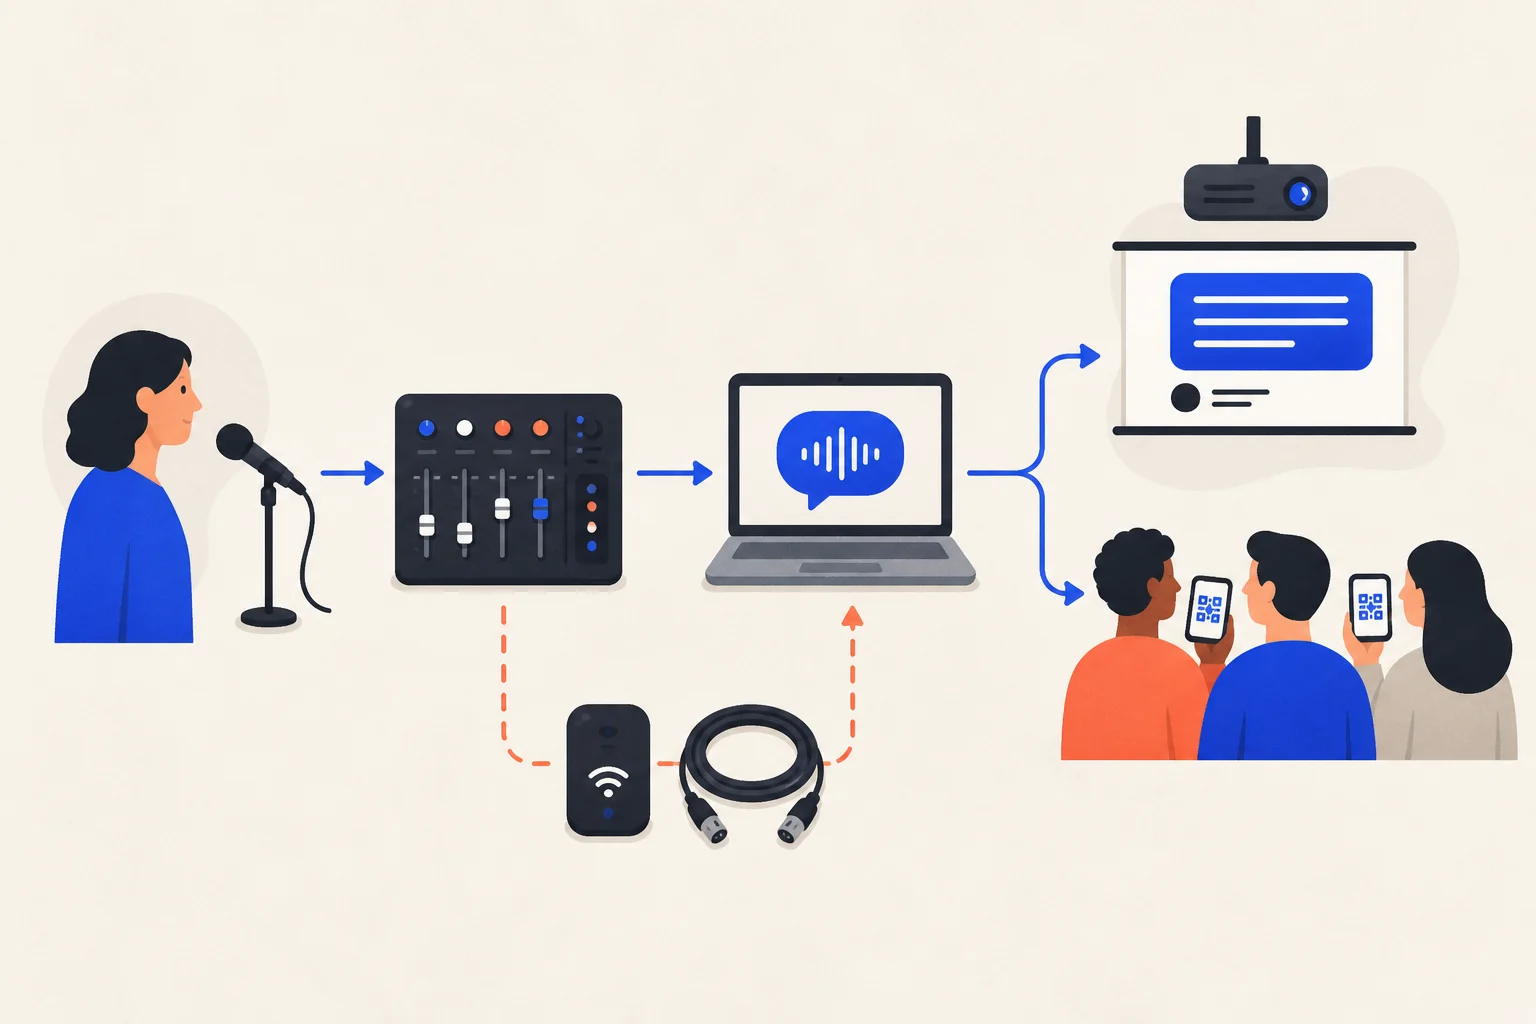
How do you get accurate audio?
- Use a lapel or handheld mic close to the speaker.
- Avoid speaker feedback and room noise.
- For a PA venue, take a clean mixer feed into the computer instead of using its built-in mic.
How should the audience view captions?
| Method | Setup | Best for |
|---|---|---|
| Projected screen | Send the Avoce caption window to the main or side screen | One shared language in a lecture hall |
| QR on personal phones | Show one QR and let viewers choose a language | Multilingual audiences and panels |
Lock names and terms with a glossary
Enter speaker, company, product, and technical names before the event so recognition and translation use consistent wording.
Choose the right engine
Direct speech translation gives the lowest latency for general talks. Use the two-stage transcribe-then-translate engine when dense terminology calls for steadier recognition.
On-site backup checklist
- Run the full audio, screen, QR, and caption flow 15 minutes early.
- Prepare a phone hotspot.
- Preload enough points: two hours of translation uses about 120.
- Know how to stop and restart after a disconnect.
Before the live event, say one complete sentence through the real microphone and verify the entire path.